How to Export Models from Regard3D with Textures
EDIT: This post is outdated. The bug has been fixed.
If you saw my previous post/video about scanning objects into 3d models you'll know the current version of the program I used, Regard3D, has a bug with exporting objects with image textures.
The developer is aware of it and it should get fixed eventually, but in the meantime, a viewer sent me an email with a better workaround so I thought I'd go over it.
In the video I mentioned one way to get around it, and that is to use colored vertices, but as was pointed out to me, this creates much fuzzier textures at equal resolutions whereas an image texture will retain it's detail no matter the resolution of the model. I personally did not care about them so I didn't really investigate further, but the solution is embarrassingly simple if I would have thought about it more than two seconds.
We know the program saves everything as it creates it to the project directory and it can correctly make and read textured models from there so the files in the project folder must be fine, the bug occurs only when a model is exported.
Steps
So what we can do is once we created our surface model with image textures (Colorization Type should say Textures), instead of exporting it, note down it's path in our project tree. For the picture set, just count which it is from 0.
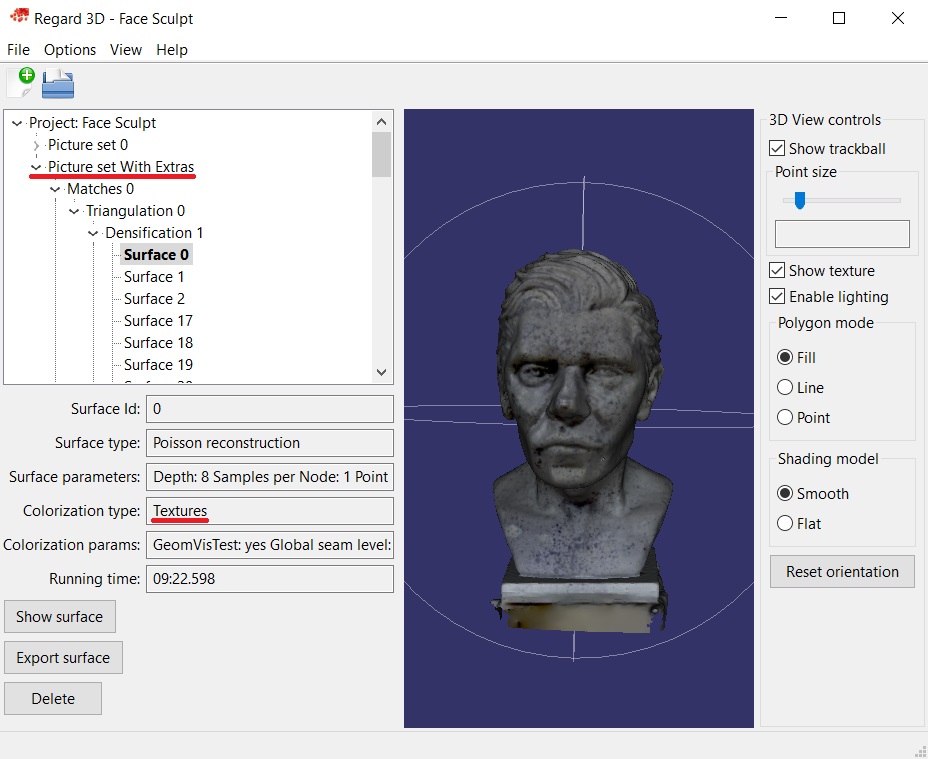
Then open up the project folder in your computer and navigate to the path (e.g. Project Folder > pictureset_1 > matching_0 > triangulation_0 > densification_1 > surface_0). Once there you'll see a bunch of files. We need the obj file (our model), the mtl or material library file (tells programs where to look for the textures), and the texture images. Copy them manually wherever you wanted to export them to.
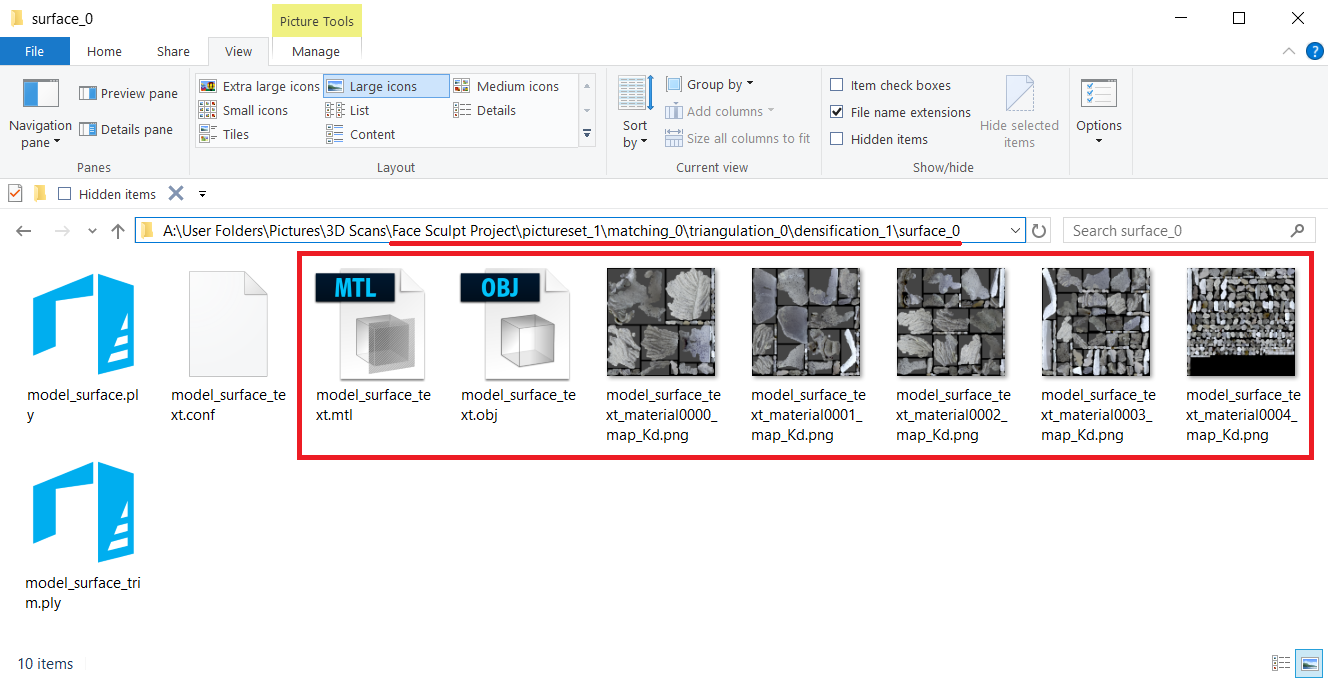
Now we can import these into Blender (make sure your import extension for obj files is on) and they should work import automatically. If the textures aren't showing up just make sure you're using the Blender render engine and that you're in the texture view. This is how Blender imports them by default. To use them with a different rendering engine you'll have to connect the textures manually.
Pros & Cons
| Colored Vertices | Image Textures |
|---|---|
| Fuzzy Textures | Detailed Textures |
| Smaller File Size at Same Detail | Much Larger but… |
| Looks Much Worse at Low Resolutions* | Same Texture Detail at Low Resolutions* |
| Computes Faster (2x +) | Computes Slower (but again ^) |
| Duller/Less Reflective | Captures more lighting artifacts.** |
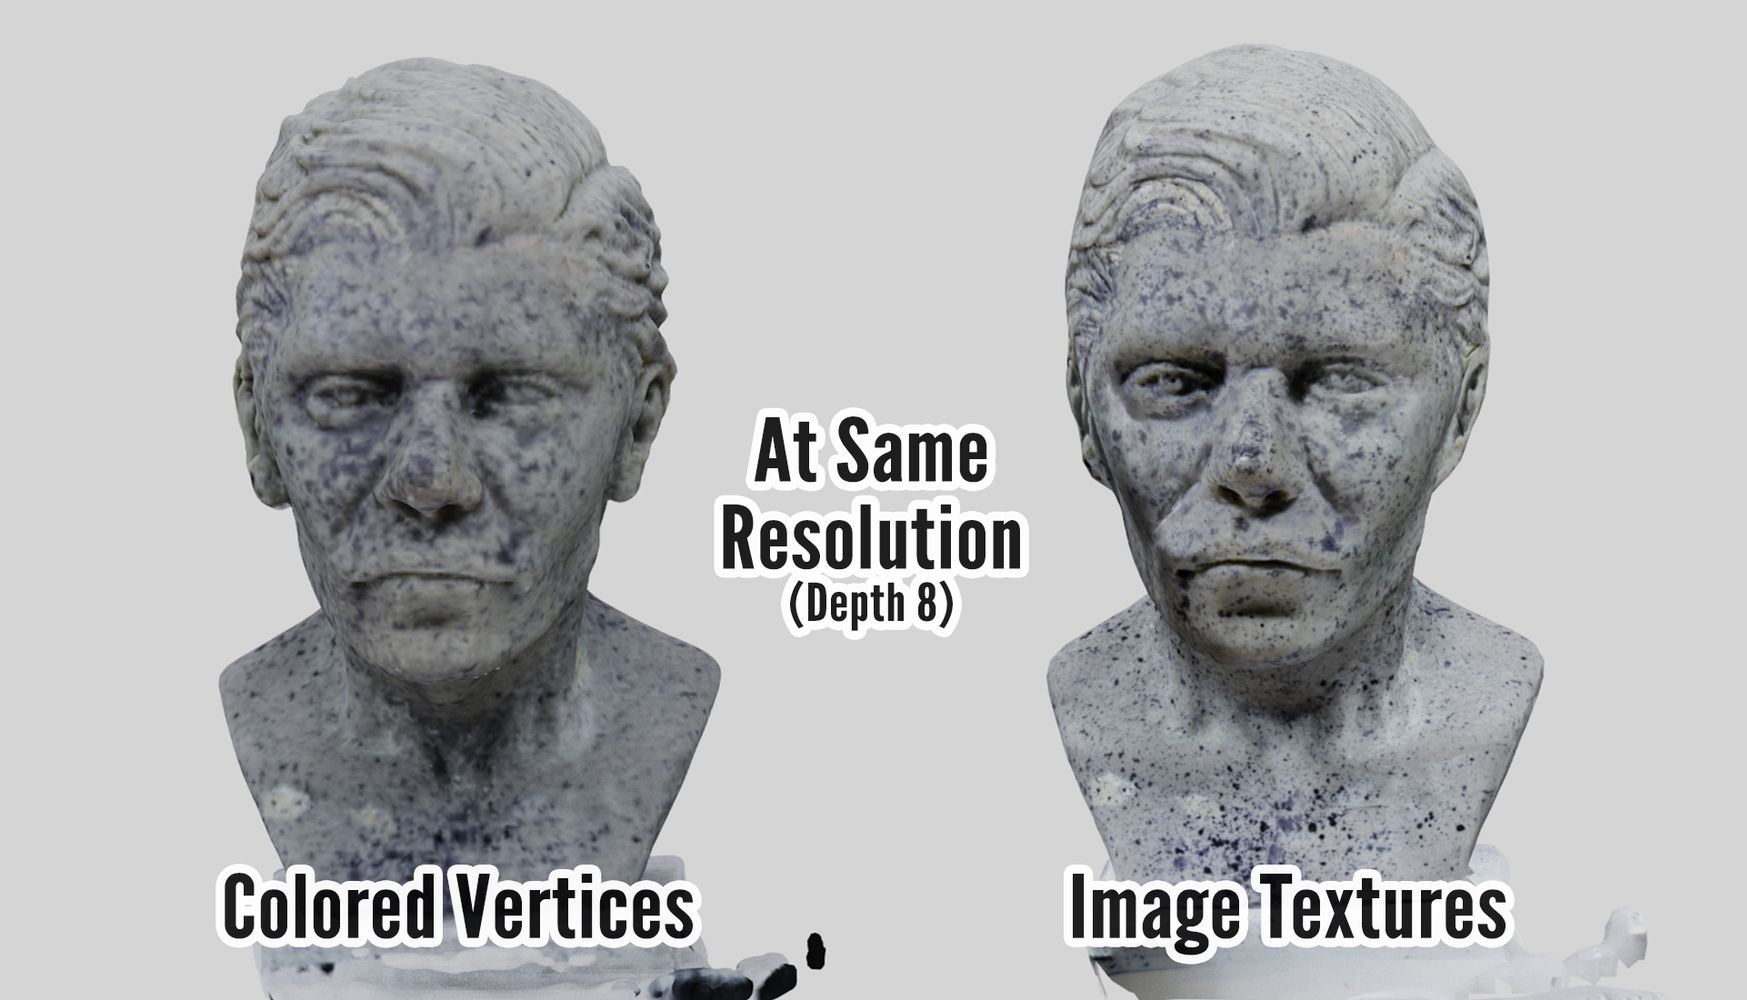
*This is because with colored vertices the amount of detail is tied to the amount of points, whereas with image textures, the texture is always the same resolution so it preserves it's details no matter the mesh's resolution.
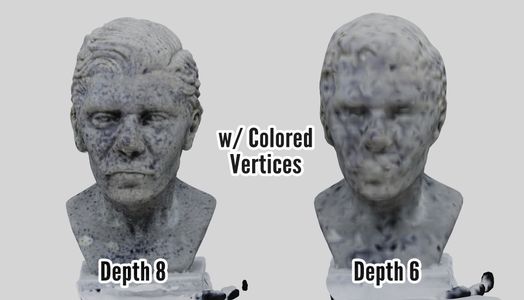
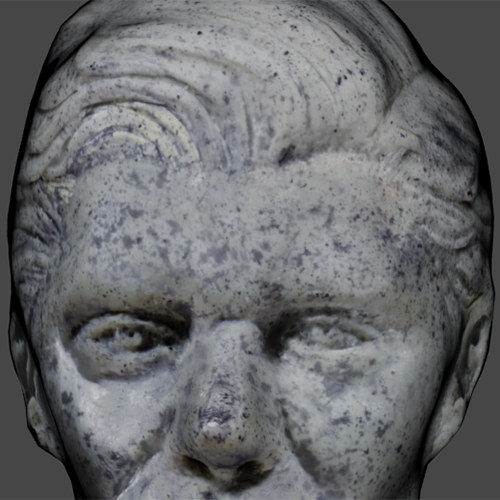
This is why in the image below, even though we're at the same mesh resolution, the colored vertices make the texture look fuzzy.
**By less reflective I mean that you don't get a lot of weird really light areas, especially if you had uneven lighting or scanned the model by turning it instead of turning the camera around the model. This causes lighting artifacts which are more noticeable when using image textures. I'm not 100% sure why that is, but it means using colored vertices might still be the better option if you don't care about the textures of your objects, just the color, and you want the scan to process faster.
For example, if you were scanning a smooth multi-colored toy, you'd need to add texture to it somehow like I did with this model by spraying it with ink. So you'd have to paint the model by hand anyways if you wanted textures, so you'd only really need a rough reference of the object's colors, image textures would be overkill.
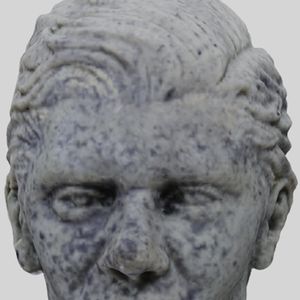
Anyways, here are some more examples for comparison.
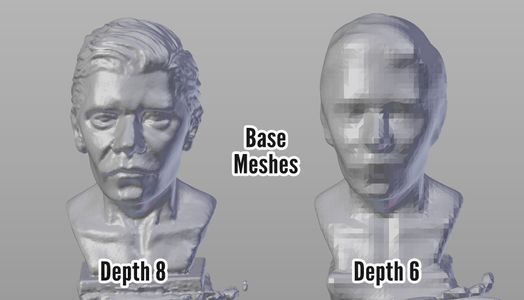
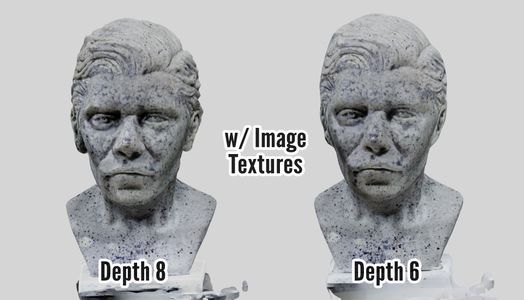
And here are some closeups, you can see how much detail the second one appears to hold even though the mesh is quite simple. If you have a keen eye you'll notice the textures aren't 100% the same, that's just because the program pieces them together slightly different at the different resolutions, but you can see the amount of detail is the same.
Depth 8 w/ Colored Vertices
Depth 6 w/ Colored Vertices
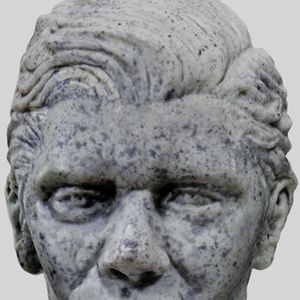
Depth 8 w/ Texture Images
Depth 6 w/ Texture Images
Other Notes
For those who might be wondering if it's possible to salvage the exported raw file, I did think it might be a simple bug, maybe an extra line or symbol or something that could be corrected by just editing the raw file, but the file is missing a lot of coordinates. Still I can open it in Meshlab and all the points are there, so if for some reason you lost all the files by this one, you could use the points to do the poisson surface reconstruction from there, though of course, you wouldn't be able to salvage the textures.