Wooden Chest
In this post I'll be showing you how I made the wooden chest.
Cutting the Boards
No matter how much you plan ahead, there’s going to be some discrepancies so I wouldn’t advice measuring, mark, and cut ALL the pieces at once. Before I cut I took some time to think it out first. I marked boards I was sure I needed cut. I also laid them out when possible to check they fit properly. With recycled wood this can be quite the problem because the boards are often curved to one side or have one face better than another. The extent you can take this planning is usually 1⁄2 or 3⁄4 of the building order. The rest I tentatively marked just to make effective use of the wood.
I’ll be mentioning my measurements to help keep track and for my records, but most of them should just be ignored.
The Bottom
First I did the bottom 7 boards. They defined the bottom area of the chest (just more in reality). I chose their 65 cm length. But then the width needed to be measured. I settled on 28.5 cm, as the side were just slightly different. Now for the bottom I laid out the boards like this because it provides more strength. So I cut the 2 short outer boards at 28,5cm. Instead of using the confusing long/short terminology I used in my notes I’m going to use outer to mean boards that reach the end, and inner to mean boards that don’t.
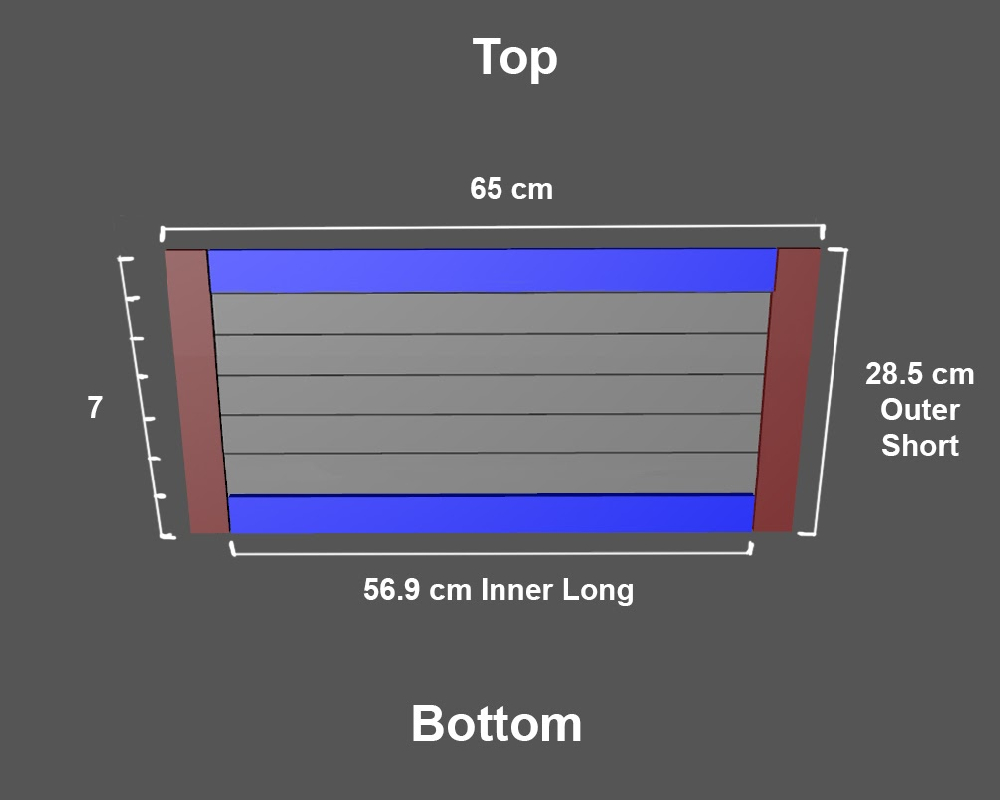
Now the long inner boards depend on these two 28.5cm boards. So it’s 65cm - x, x being the width of the two short outer boards (not just multiplying one, but adding both and at both ends). For me that came out to 56.9cm (in this case the same, but for the sides some where a few millimeters off).
The Sides
I had already check that all the side’s heights would be pretty close. So I went ahead and cut the 65 cm boards for the front and back. The shorter sides depended on that first 28,5 cm measurement and the thickness of the front & back boards which thankfully didn’t vary much. I got 26.5 cm.
Next came the borders. I laid out all the sides side by side (there’s a tongue twister) and then decided on a height that would look good on them all. There was a bit of room for error, because unlike the bottom, I wanted all the other sides to have long outer border boards and short inner ones just because I thought it looked better.
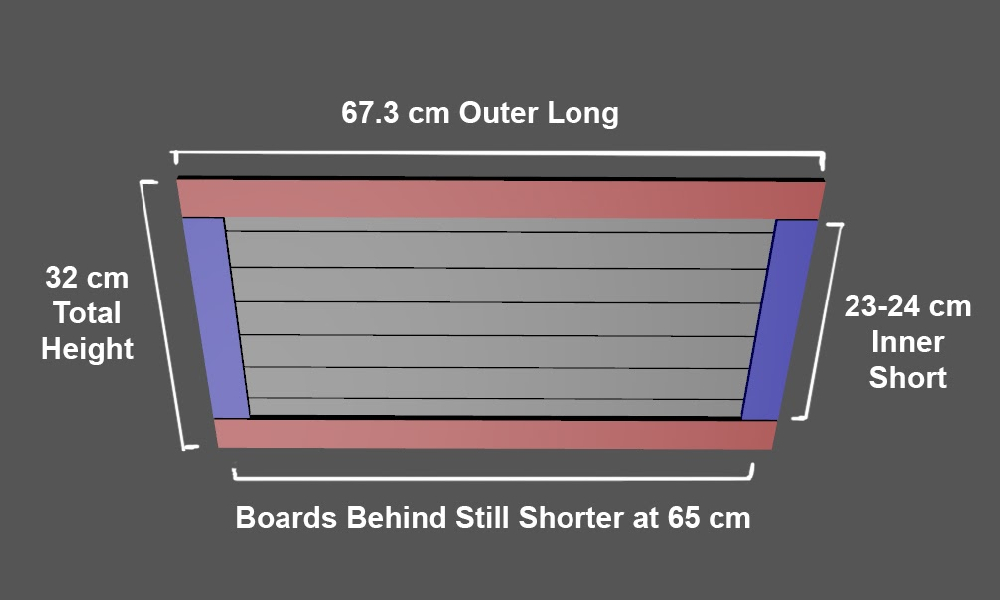
I decided on 32cm in total. So this would be the height of the box. Note that you have to factor in the thickness of the bottom of the chest. This was so that instead of having to use 8 boards for the sides, I could use 7 because and between the thickness provided by the bottom boards and the space left for the lid they fit in just fine and I thought I was short for wood at the time.
But I couldn’t cut those short inner border boards just yet. First I had to cut the long outer boards. For the front and back these were 65 cm + 2x, x being the thickness of the boards. This gave me 67.3 cm. For the left/right sides this was just 28.5 cm like the bottom outer short border.
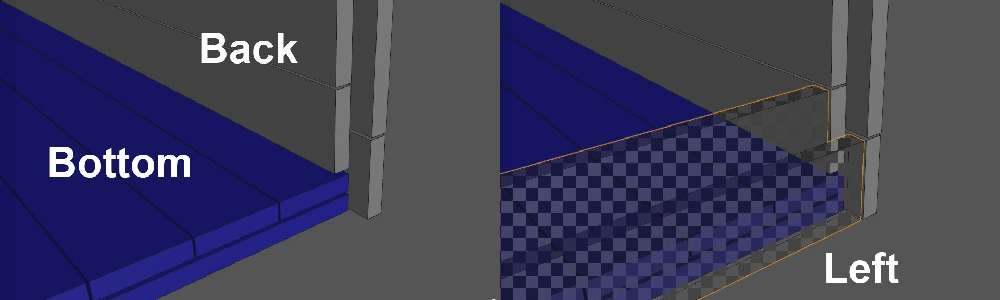
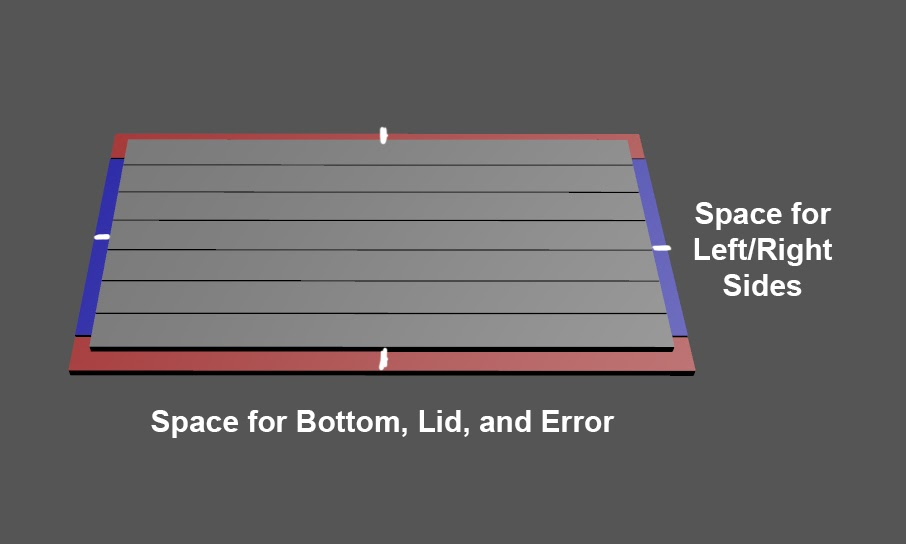
Here you can get an idea of how the corners fit.
Now I could lay out all the borders and measure the short inner boards individually so that in total all the sides heights add up to 32 cm. They ended up 23-24 cm as shown in the first picture.
The Lid
I cut the final 7 boards for the top at 65 cm. The long outer borders at 67.3 cm. I left the short inner boards for after I put the chest together just to get a perfect fit. They ended up around 22.8 cm.
Putting it all Together
I used 9x20 (they’re in mm here) nails. Just short enough that they wouldn’t go through two boards.
The Bottom
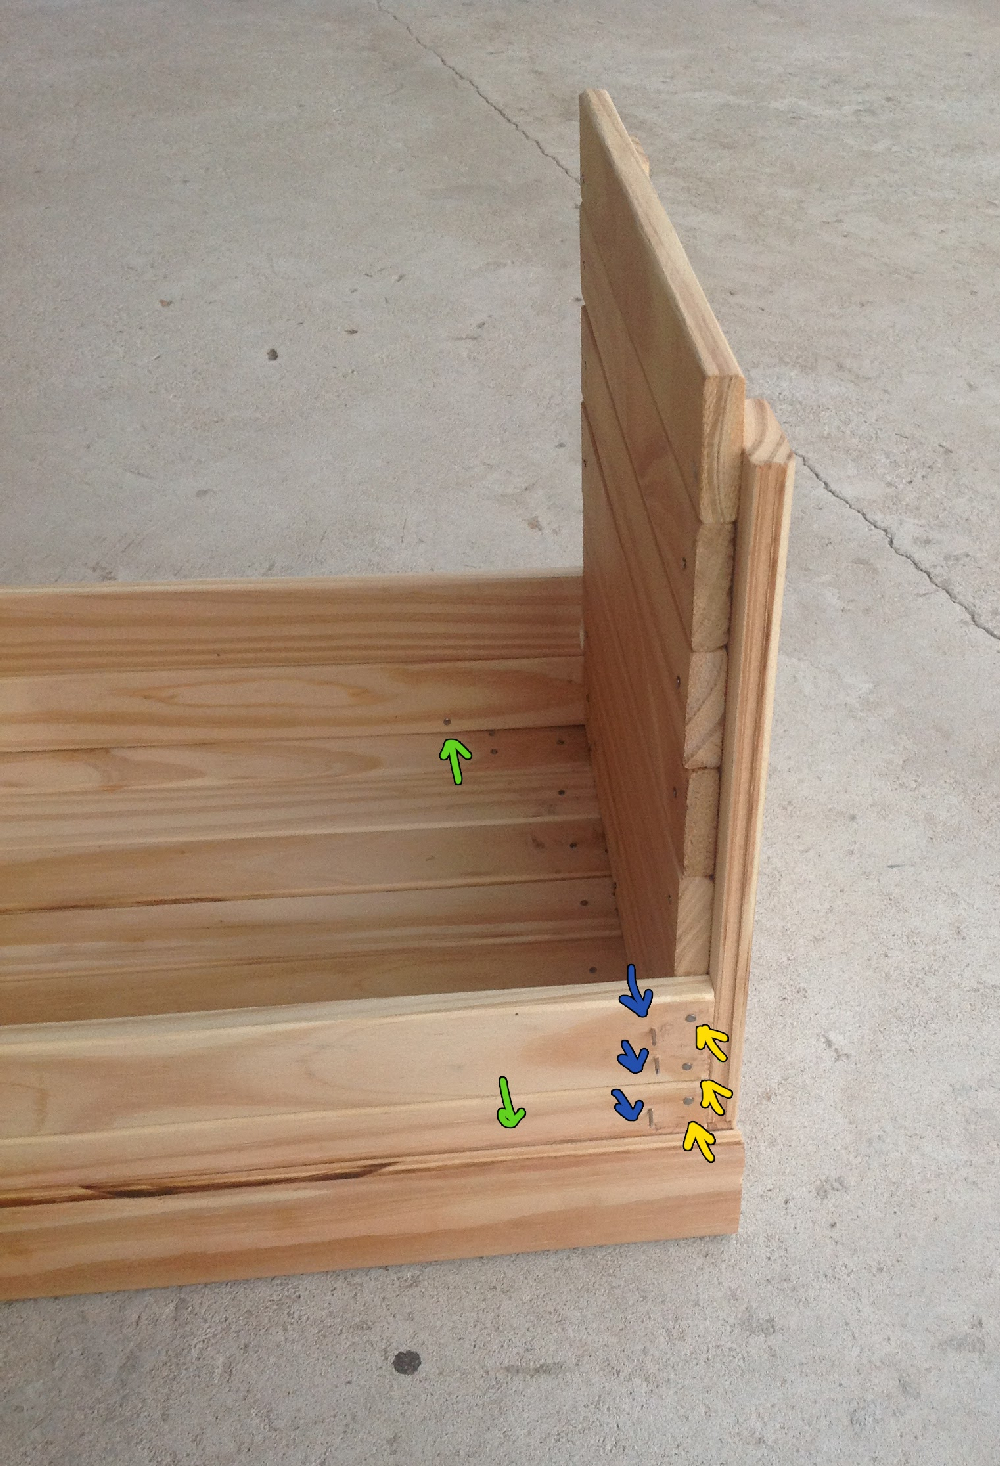
To have zero nails visible on the outside, this is how I put them in on the bottom, with only slight variations of the method for the sides. Blue mean the nails are going in from the inside of the chest. Yellow means going in from the outside, they hold onto the sides. Then the orange ones are for just holding the boards to the bottom border, that’s why there’s fewer of them.
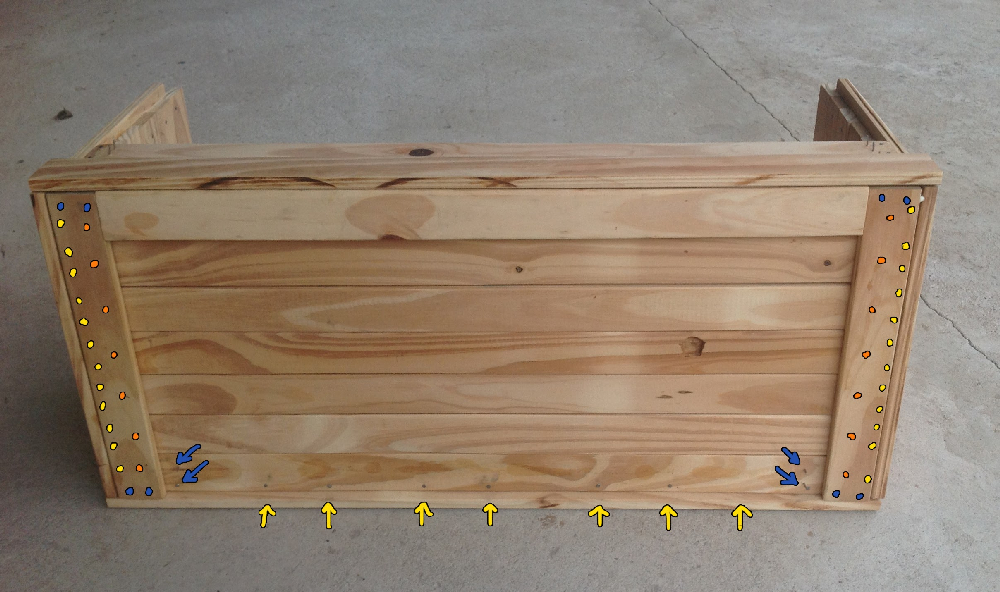
I kind of did these all at once. There was lots of camping, gluing and ungluing. I thought building it would be easier so I hadn’t thought it out as much. But even now looking back, to make the nails invisible like this I would have had to unglue one part at least once, and not using glue was impossible because the pieces would move around everywhere when I hammered them.
The photo was taken a few steps later. In reality this first part just consisted of the bottom border, the bottom boards, and the bottom board for all the sides.
The Left/Right Sides
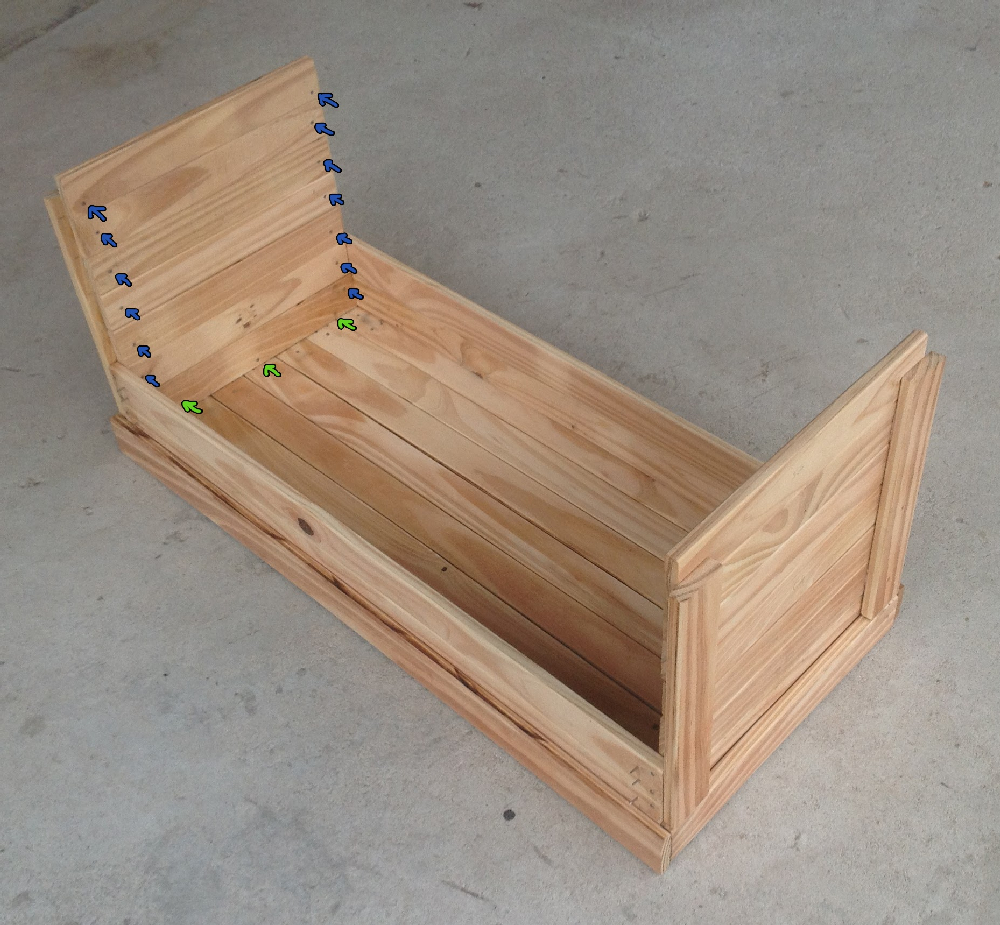
These have to be done first to be able to connect them to the front/back sides properly at the edges. First I glued the side boards to their respective borders, I started by putting up the bottom vertically and on the respective side because as you’ll remember I already attached the last board of all the sides. With some odd maneuvering, I nailed all the boards to the short inner borders. Here the blue are nails going from the inside to the short inner border boards of the outside and the green are going from the inside to the outside as well but connecting the long outer border.
The Front/Back Sides
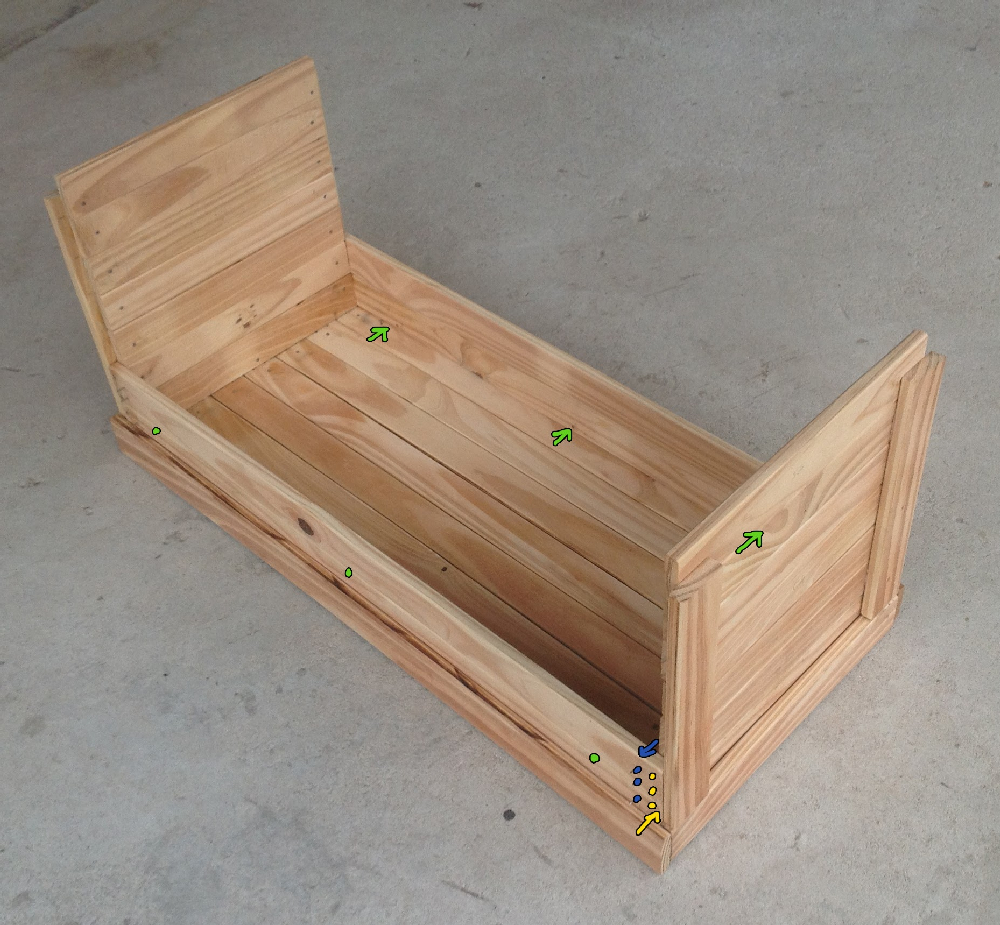
I messed up here as well. It would have been easier to first nail all 7 boards to the left/right sides with the nails indicated in yellow (going from the outside in) then attached the border with the nails indicated in blue and green (going from the inside to the outside).
The Top Border Boards
I left these for last because it was very hard to properly attach the bottom borders all level. That meant some of the short inner borders that to be sanded until all the top border pieces were level.
The Top
I finally double checked the short inner sides and cut them. Next I loosely glued the border together. When the glue had set I glued the seven boards to it. As it set I turned the box over and checked that the lid would fit. I left it all like that with the box on top until the glue had dried. Once it was dry I nailed all the boards to the border and it was done.
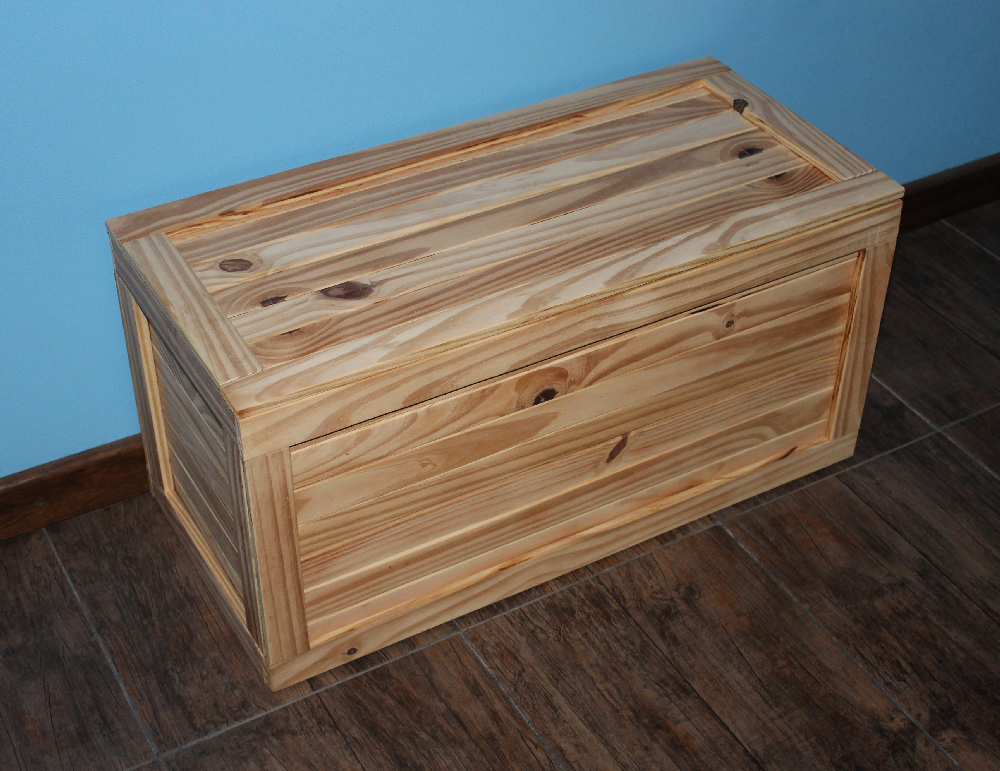
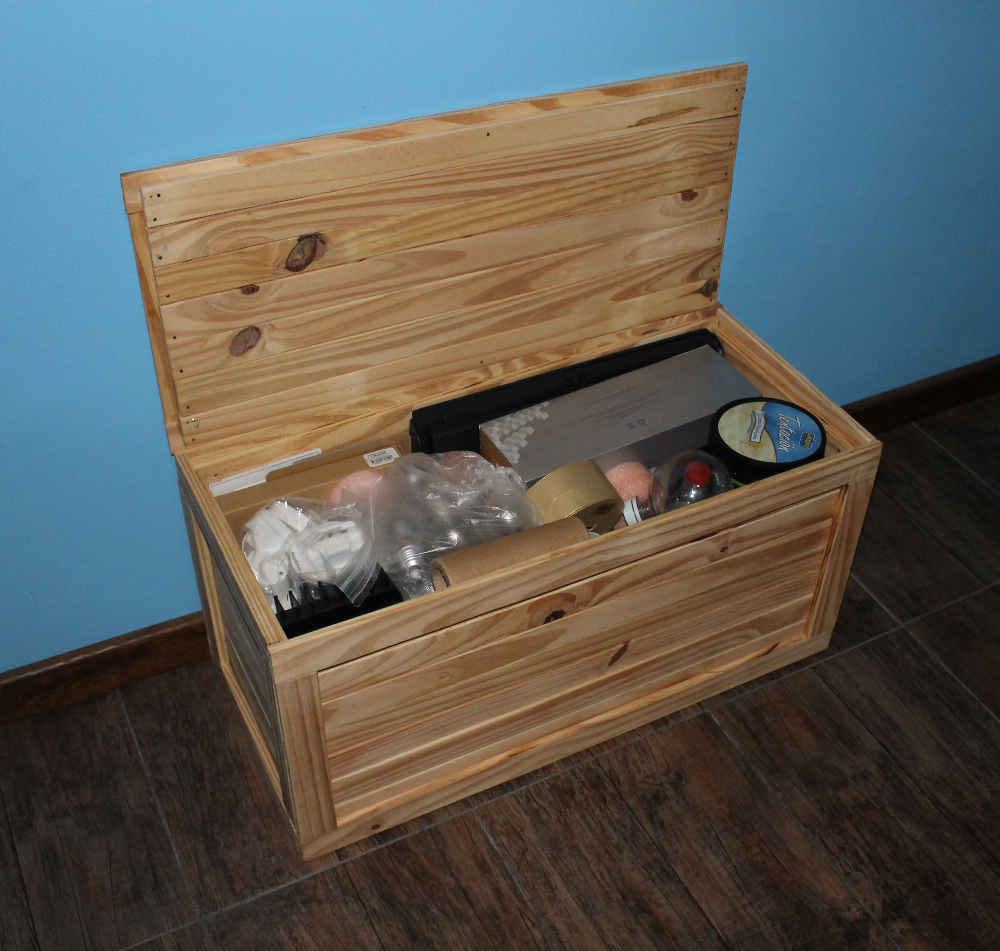
The Finished Chest

I haven’t applied varnish to it yet. I decided to just put it to use anyways because something came up and it might be a while before I can buy the varnish. I’m also unsure about whether I want hinges or if they’re even that possible given how I made it.
One’s man trash is another man’s trash.
And here’s all the junk I put in it. It’s mostly just odd plastic parts/boxes/cases that are too big to fit anywhere else. For years I kept all this in like a huge paper bag I had. Then after a move three years ago they’ve been in two annoying cardboard boxes ever sense. I would have kept them there except it’s not so much that stuff is piled on top of each other and hard to get out (that’s always going to happen) but longer tubes and stuff didn’t fit and the smaller the space, the harder it is to use the space efficiently.