Polymer Clay Basics - Part II
This is part two of the polymer clay basics tutorial. See Part I here.
Armatures
My first tip is to use a sturdy bulked out armature that's a attached or can be easily attached to some sort of base. You do not want to try sculpting anything complex without an armature because you'll never find a place to grip it without ruining a different part.
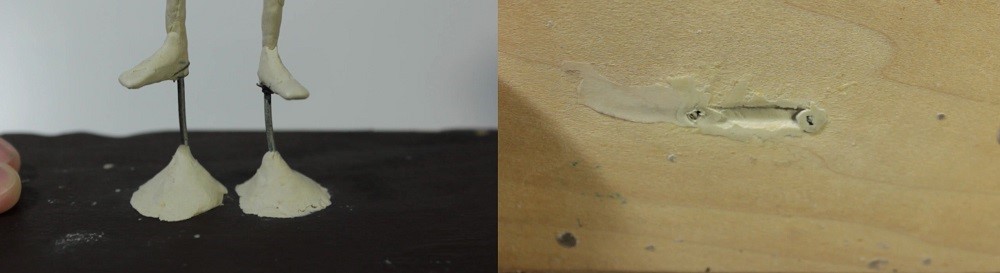
For a figure you can run the main wires through the base of a piece of wood like this.
And on the top and bottom I used a special 2 part epoxy clay to secure it, more on that in a bit.
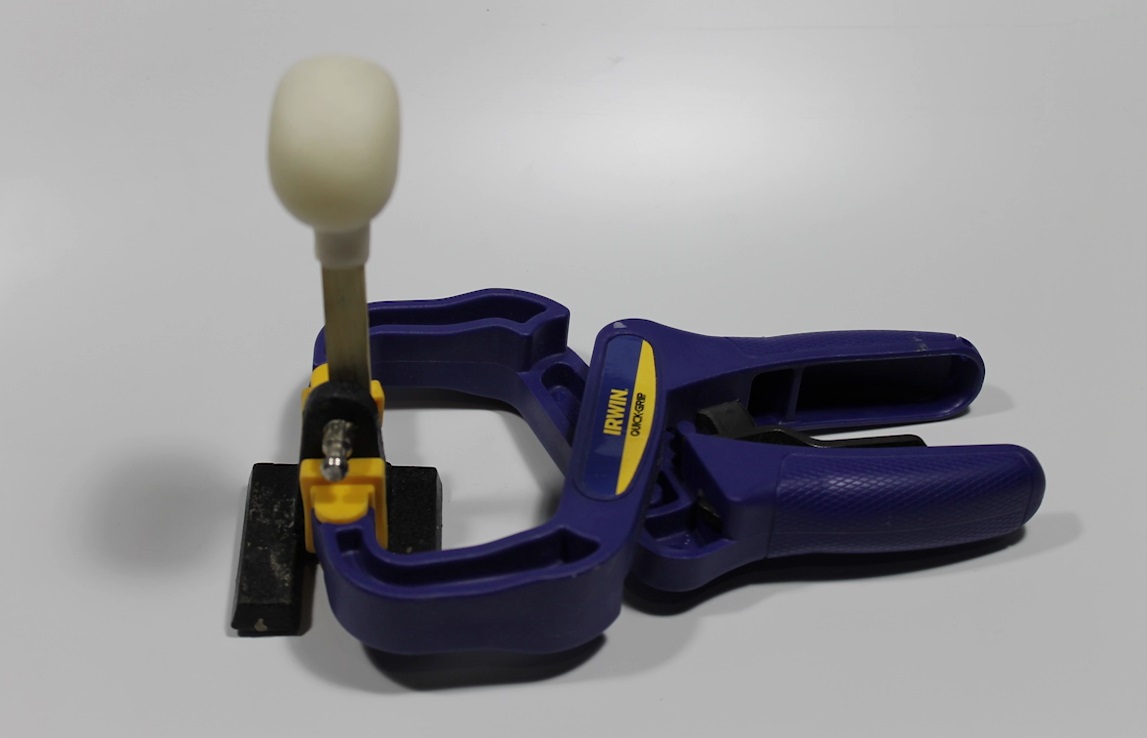
For smaller parts you have to find a way to clamp them to something steady. There are proper stands and clamps you can get specifically for sculpting, and there are many ways to make your own, just keep in mind the type and size of sculpts you'll be making. For example, the stand I'm using I bought for soldering and really tiny sculptures, so it didn't work well at all for the larger head I made. So I'm looking into making something to replace it that's also easy to film. The clamp setup above, although it worked really well, was not easy to film because I move it around so much. You can see this in some parts of my head sculpt time-lapse.
Now if possible, use a base you can just pop into the oven. Here I used some water based clay to make a base. But wood also works fine. It won't burn or anything because the temperature you're baking it at is too low and you can grab it without getting burnt when taking it out of the oven (which is not true for metal or even any of the clays I've tried). Otherwise if you don't have a stand, you'll have to lay the piece down and that part will get burnt and slightly flattened. It can be cut away but it's still something to consider.
I also want to mention that you should protect your work surface with something, at least a sheet of paper if you're working with bases because otherwise you'll get scratches all over your desk from moving it around.
Using a turntable might also be useful and is something I'm looking into. In summary consider the following when choosing a stand:
Size of the sculpts you'll be making.
Whether it's a part like a head or it's a full figure.
It can be in the oven.
…and preferably has some place to grip it that won't burn you when it's hot.
Easily handled and rotated (turntable) without having to grip the actual sculpt.
This one is more for me, but if you want to film your sculpts, that's also something to consider.
As for the actual wire to build the armatures, I got these two rolls and never needed anything else.
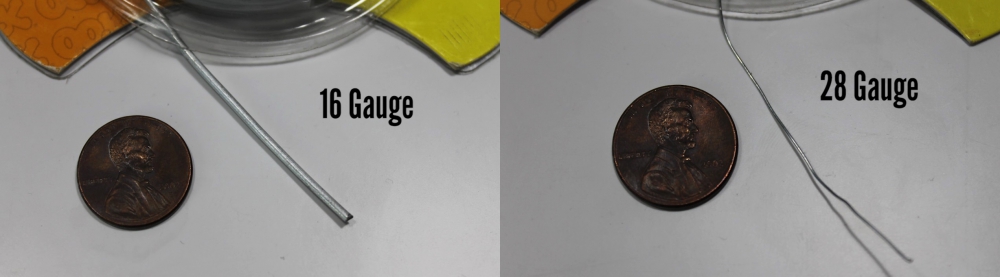
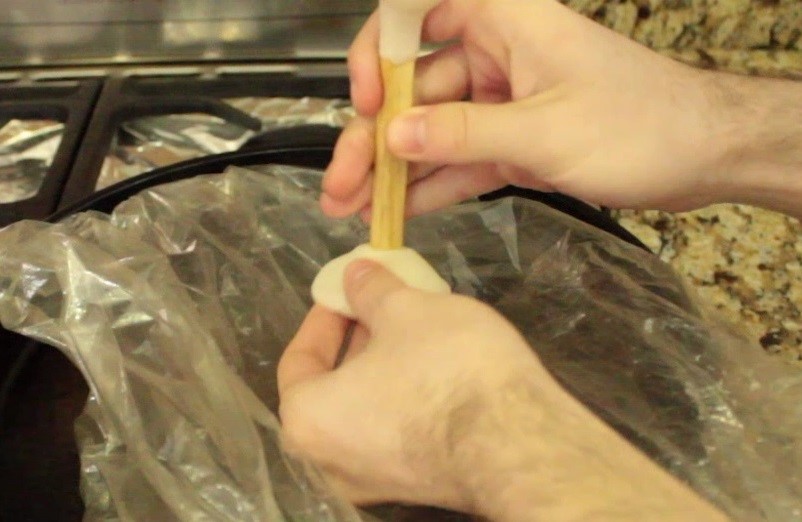
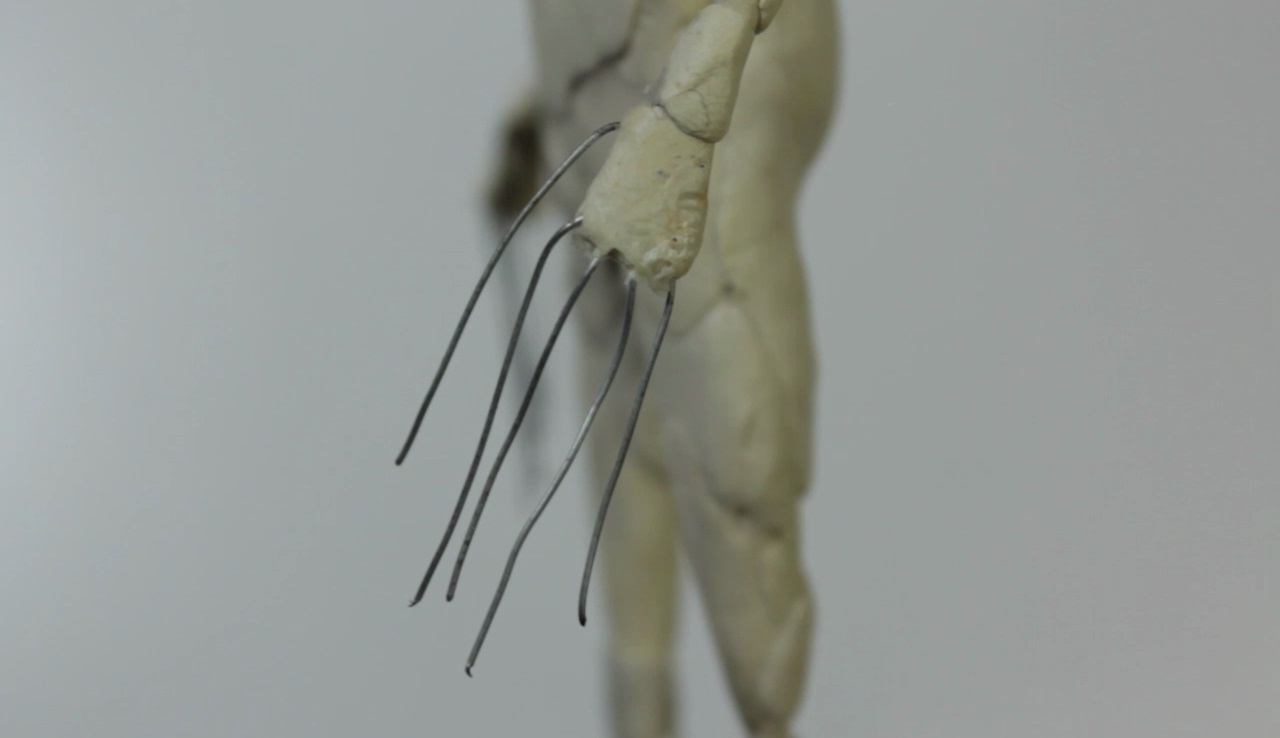
These are galvanized steel, but anything that doesn't rust will probably work, and I'd recommend having something around 16 gauge for medium sized pieces like this one, and 28 gauge for miniatures, or for if you need to add extra support in thin areas, or to attach things like these fingers.
Bulking out Armatures
Apart from an armature you also need to bulk your figure out, not just to waste less clay, but to reduce it's weight and make it easier to work on. A lot of people use aluminium. I personally can't stand it. I gave it one last chance, wrapped it in wire over a groove in the wood. It still moved and wobbled. And it's always lumpy. When you try to smooth it while sculpting if you mess with it too much, it starts to shed little pieces. I hate it.
Instead I like to work over something solid. For this sculpture that I never finished, I used a two part epoxy clay called Fixit-Sculpt. It feels similar to polymer clay just slightly stickier. It has a working time of 3-4 hours and cures within a day and you can do stuff like add little wires for the fingers like I showed. You can even just use this instead of polymer clay. But it's more expensive. I've heard of people using cheaper plumber's epoxy clays, but I've never tried them and from what I understand those are meant to cure quickly so you don't get a lot of working time (but that might be an advantage to some?).
Now I just use an air-drying water based clay called cold porcelain. It's really cheap, light, and dries rock hard. I'm not sure how available it is outside my country, but you can easily make your own (it's mostly glue and cornstarch). There are different types of water based clay, just be sure they're tough when dry, they can survive being put in the oven, and they've properly dried before using them because they tend to shrink and loose detail which is why you can't really use them for detailed stuff on their own. The ideal material in my mind would be:
Inexpensive
Strong
Light
Flexible (just a bit)
Easy to Smooth
Can be in the oven (and is preferably not affected by heat).
Can be easily carved.
For my head sculpt though, it was very humid those days and the cold porcelain was taking too long to dry so I used sculpey and baked it, which is a bit wasteful, but it is one alternative. Like I mentioned before, it's perfectly fine to work in layers using the normal cooking directions. I still have no idea how people can work all at once. I baked this head when I did the initial sphere, when I finished the facial features, after each ear, after the neck, and then the final bake, for now, was the hair. Baking in layers also helps if you've got uneven thicknesses in a figure. This might be because my oven takes forever to heat up, but ears and hair strands, for example, are likely to change color if I cook a piece all at once because they're cooked for a longer time than in layers. I did get a little bit of color shift on the nose but it was in a very early layer, and it's still less than what would have happened had I baked it all at once. I've also heard layers help avoid cracking with thick areas, but I've not had problems with cracks myself.
Also even if you can work in one layer, I've found that if you only sculpt every now and then and take a long time, the clay will start to harden and become brittle like it does in storage. It's not immediately noticeable sometimes. This clay has been on this armature for over a year now and you can still push it without any noticeable effects. But here's a bit from the same batch of clay I softened for that figure. Again you can push it around, but look what happens as I push at increasingly fragile areas.
It's really dry. I've never cooked it when this has happened, but I can't imagine this being good. If you plan on leaving a project for more than I month, if it doesn't look good or you were just starting to block out things like here I'd take it off, otherwise if it looks decent, I'd bake it.
I've always had problems with my clay hardening quickly but I've heard some people don't so you can also save a piece like I did from that batch you mixed for the sculpt to test for flexibility later. Edit: Also be sure to cover your sculpt any time you put it away with a plastic bag to keep it from getting dusty.
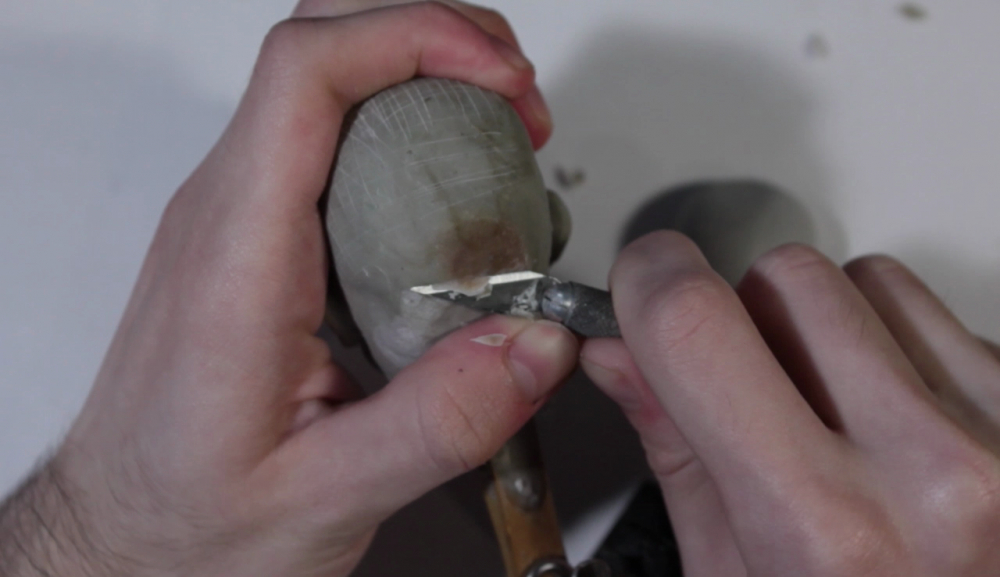
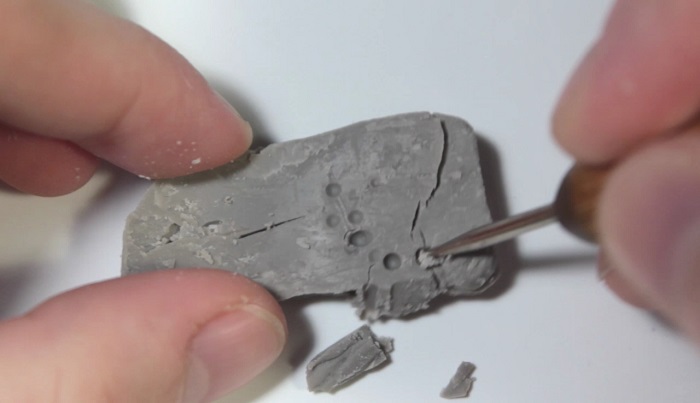
Now if you find you baked it and you made a mistake you can also carve away at baked clay if you need to redo a part. If money wasn't a problem, I'd probably only use epoxy or polymer clay for everything because they're the easiest to carve away at (with polymer clay being slight easier than epoxy, but also less strong and with a rough texture where you cut it). The cold porcelain clay is a lot harder in comparison so I try to make sure it's the right size and as even as possible when using it to bulk out.
Reference
Now whatever you want to sculpt, even as you're bulking out an armature, always try to use reference . Also if possible get or draw a side and front view and print it out at the size you're sculpting if you can.
This will help you bulk out to the right size, and keep your sculpture proportioned. Alternatively you can use your computer screen, just note the zoom level you're viewing the image at.
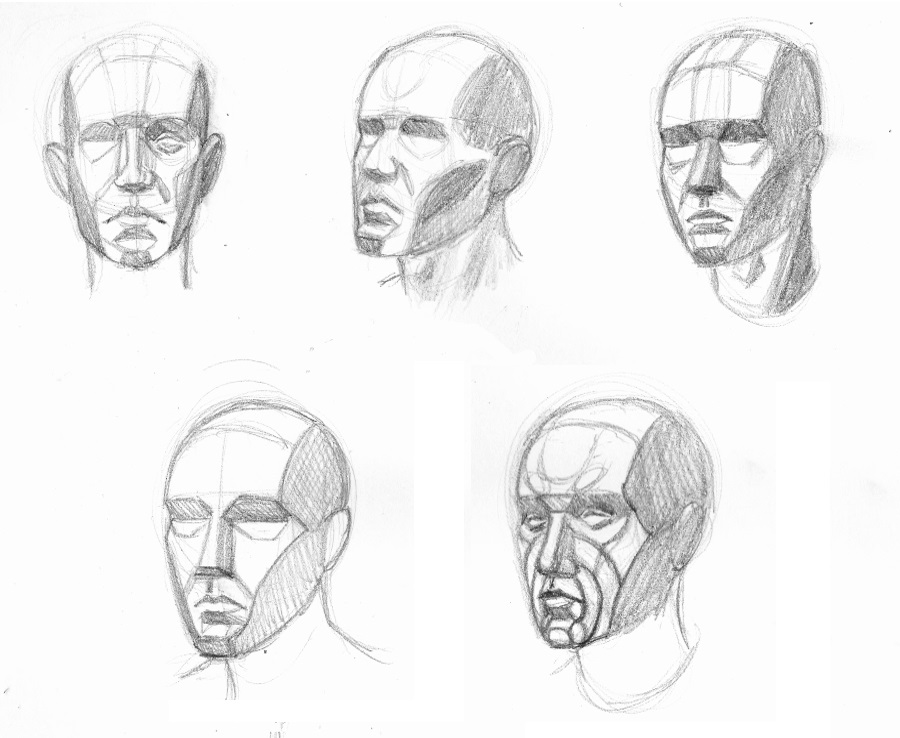
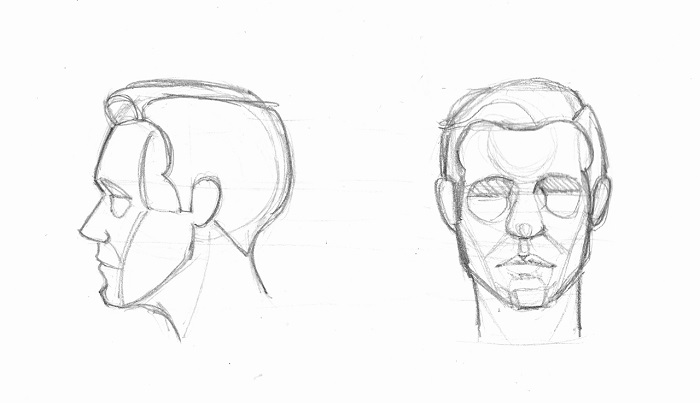
Apart from photo reference, it can also be useful to do some brainstorming sketches, especially if you only have a vague idea of what you want to do. Here are some sketches I made to test how I might do the planes of the face. It might be hard to make them accurate, but they can still be helpful. I've narrowed down for example that I want something simple and that the mouth gives me the most trouble.
I will get into measuring and symmetry in the third part.